Set Up Community Details, Branding, Language, and Privacy
Configure the identity and access defaults members see before adding courses or inviting people.
In this guide2 sections and article resources
Article resources
Open Creator console → Settings → Community → General. You need owner/admin access that permits community configuration.
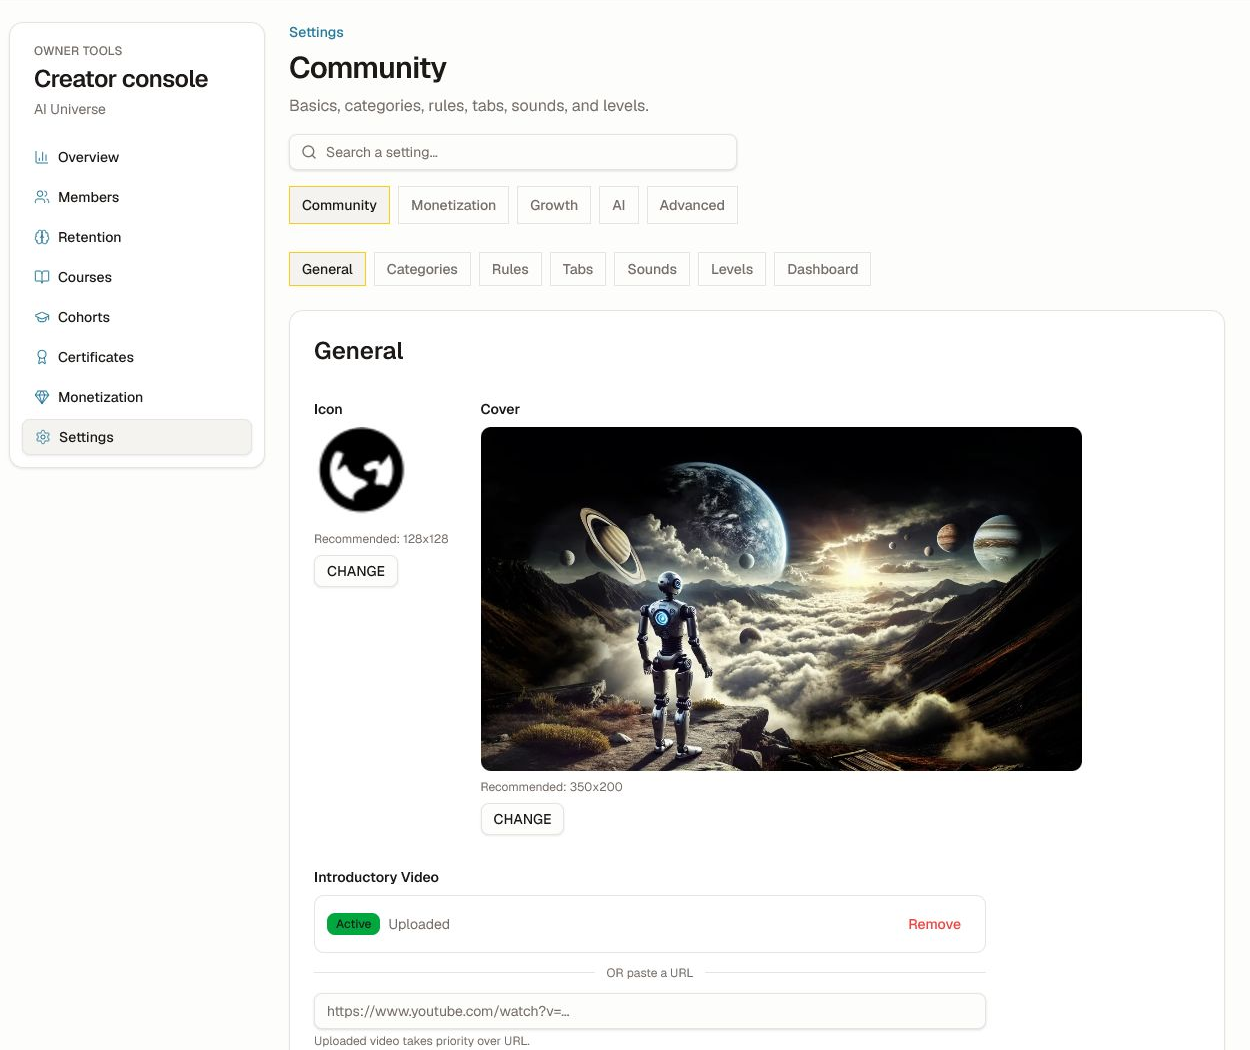
Configure the member-facing basics
- Upload the square icon and cover image using the recommended dimensions shown in the form.
- Add an introductory video upload or URL if the community needs an orientation. An uploaded video takes priority over a URL.
- Write the community name and a concise description that names the audience, promise, and next action.
- Set the default language. Members without a profile language inherit it for the group, tutor, email, and discovery defaults.
- Review the community URL before sharing it. A later URL change can break bookmarks, campaign links, integrations, and published Help instructions.
- Choose the theme or custom palette, then check contrast in light and dark mode.
- Choose Private or Public. Private limits non-member visibility; public permits discovery and public surfaces where supported. This setting does not override course-level access.
- Add the support email and choose Save Changes.
Verify before inviting people
Preview About, Community, Classroom, Calendar, Members, and the purchase/request-access path with a separate member account. Check the default locale, mobile layout, support address, privacy boundary, draft visibility, and public metadata.
If a saved value appears stale, reload the member view and confirm you edited the intended community. If an asset is still processing, wait for its status before replacing it. Do not upload images or videos containing member data, private conversations, secrets, or media you are not allowed to publish.
Was this helpful?
Your response helps us improve this guide.